To some people in Singapore, bak kwa is that time of the year when Chinese New Year happens.
If you are like that, why not make your own bak kwa so you can have it anytime you like and you don't need to pay through your nose for it?
The good news is that your own version of bak kwa made from scratch at home can cost less than S$15/kg. Retail prices can exceed S$55/kg during CNY peak periods.
And the health nut in you can rejoice because you can omit the colouring and preservatives that go into bak kwa when you make them yourself. Painstakingly.
Here's a step-by-step guide as to how you are totally going to nail this recipe.
HOMEMADE BAK KWA RECIPE
Ingredients:
1kg minced pork/chicken/beef (the fattier it is, the more tender, juicy and fragrant)
100g sugar (caster, fine, white, brown- your choice)
2 tablespoons fish sauce
2 tablespoons light soy sauce
2 tablespoons oyster sauce
2 tablespoons shao xing wine (Chinese rice wine)
1 tablespoon kecap manis (dark caramel sauce is recommended here)
1/2 teaspoon five spice powder
1/2 teaspoon dark soy sauce
1 tablespoon honey
Pepper and salt to taste
Red liquid food colouring (optional)

No special brands here, just the regular seasoning you'd find in most kitchens.
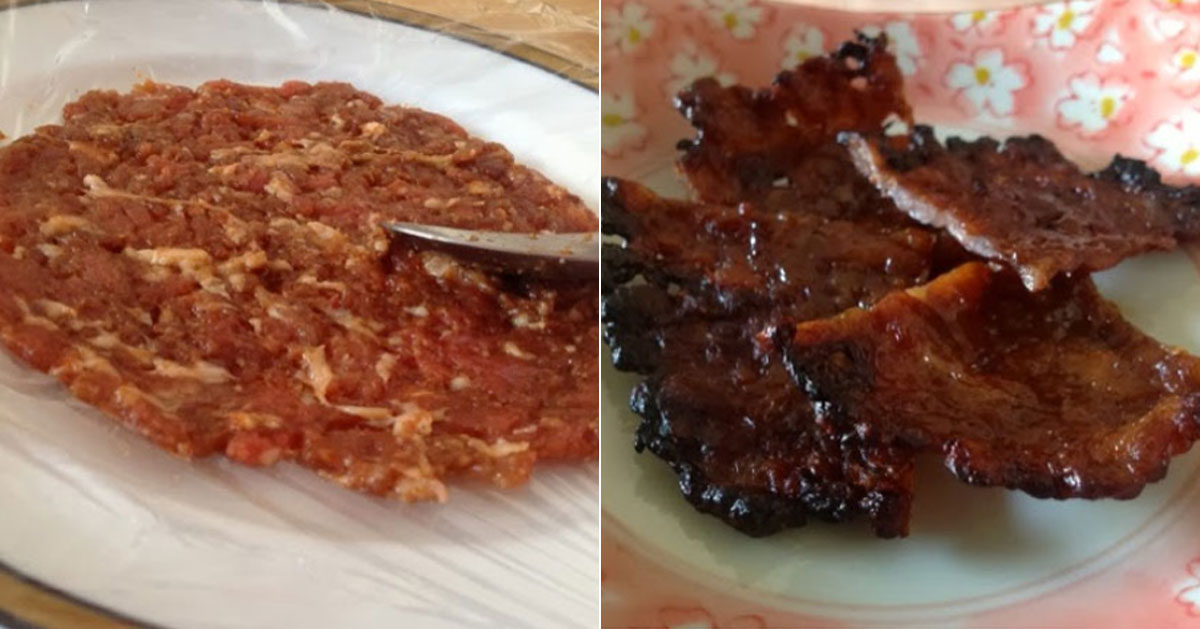
1. Add all the ingredients and mix in well with the minced meat.
2. Ensure that all ingredients are stirred well. The meat will turn from lumpy to gooey. Gooey is when you know to stop, about 5 minutes.
Preferred mode of mixing is using chopsticks, though feel free to use a spoon or fork. Stir it well, if it is still lumpy, the pieces will fall apart when cooking.


3. It's gooey now. Time to stop and refrigerate it overnight for 6 to 8 hours. The next day, once out of the fridge, wait for it to thaw a little and give it a good stir once more to ensure it spreads well.
4. Spread it on cling wrap. If you use a baking tray or a pastry board or your kitchen counter-top, you'll get a bigger piece, and you can make it rectangle in shape.
You can use the back of a spoon, your fingers, or a rolling pin. A plate and the back of a spoon works as well for flat, round pieces.


5. Once you have it spread out, transfer to baking/ parchment sheet or aluminium foil.

6. The meat sticks well to the cling wrap and this is the fun part. Flip it on the baking sheet and peel the cling wrap off. (It's like peeling the plastic sheet off your brand new phone or monitor.)


7. Put it in a dehydrator to dry it out. You can use a regular oven, at 150°C, and leave the door opened.
The temperature would depend very much on your oven, so experiment and see what temperature is optimal for your oven.


8. This is how it looks like dried out and it's time to flip. Admittedly, it does not look appealing, but have patience... And take a deep breath. Your kitchen will have the mouthwatering scent of Bee Cheng Hiang.

9. There will be some juice/ liquid and it helps to drain it off or dab it away at this stage.

10. Just a few more minutes, remove from oven and cut it into smaller pieces.
Return to the oven at 220°C to brown and char the pieces. And here you have it. Enjoy.

A recap of steps:
a. Mix the all the ingredients thoroughly, ensuring the lumpy meat becomes gooey, so it will not fall into pieces when cooking.
b. Refrigerate the mixture overnight or 6-8 hours.
c. Thaw the meat from out of the fridge and give it a good stir to make it more gooey.
d. Pre-heat oven 150°C
e. Spread out the meat on cling wrap and transfer to baking tray and place in oven with oven door opened.
f. Bake for 10-15 minutes at 150°C with oven door open.
g. Once meat is dried, remove from oven and cool. Increase oven temperature to 220°C.
h. Cut into smaller pieces and return to oven.
i. Bake for 10 minutes at 220°C, or until charred.
j. Savour your homemade goodness, and don't forget to take pictures first!
Not everyone has the luxury of firing up a BBQ grill at home all the time, right?
Well, an oven will usually suffice when making bak kwa at home.
However, if you get the chance, bak kwa over a coal fire yields the yummiest results.

Recipes, pictures and cooking method courtesy of Denise Tan
If you like what you read, follow us on Facebook, Instagram, Twitter and Telegram to get the latest updates.