Follow us on Telegram for the latest updates: https://t.me/mothershipsg
With the right tools, anyone can see the Milky Way in the light polluted urban jungle that is Singapore, and perhaps, even from the comforts of their own home -- weather conditions permitting, of course.
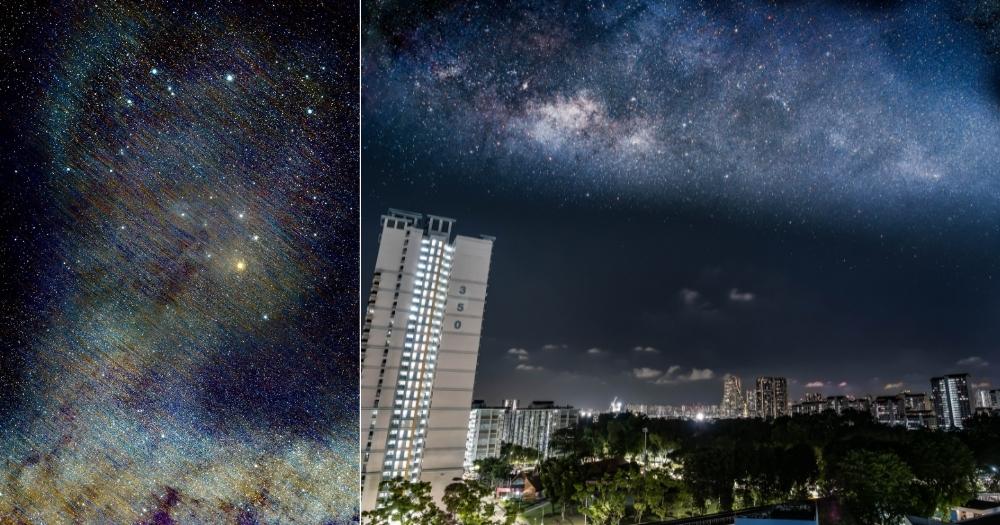
Milky Way from Ang Mo Kio
One man in Singapore proved just that by capturing the Milky Way right from his living room window in Ang Mo Kio.
The man in question is 33-year-old Joshua Chua, who uploaded his stunning composite photo of the Milky Way onto the Cloudspotting & Skyspotting Singapore Facebook page.
Chua told Mothership that some 110 photos were taken between 11pm to 11:45pm on Jun. 27, when the weather was almost clear and there were "minimal clouds".
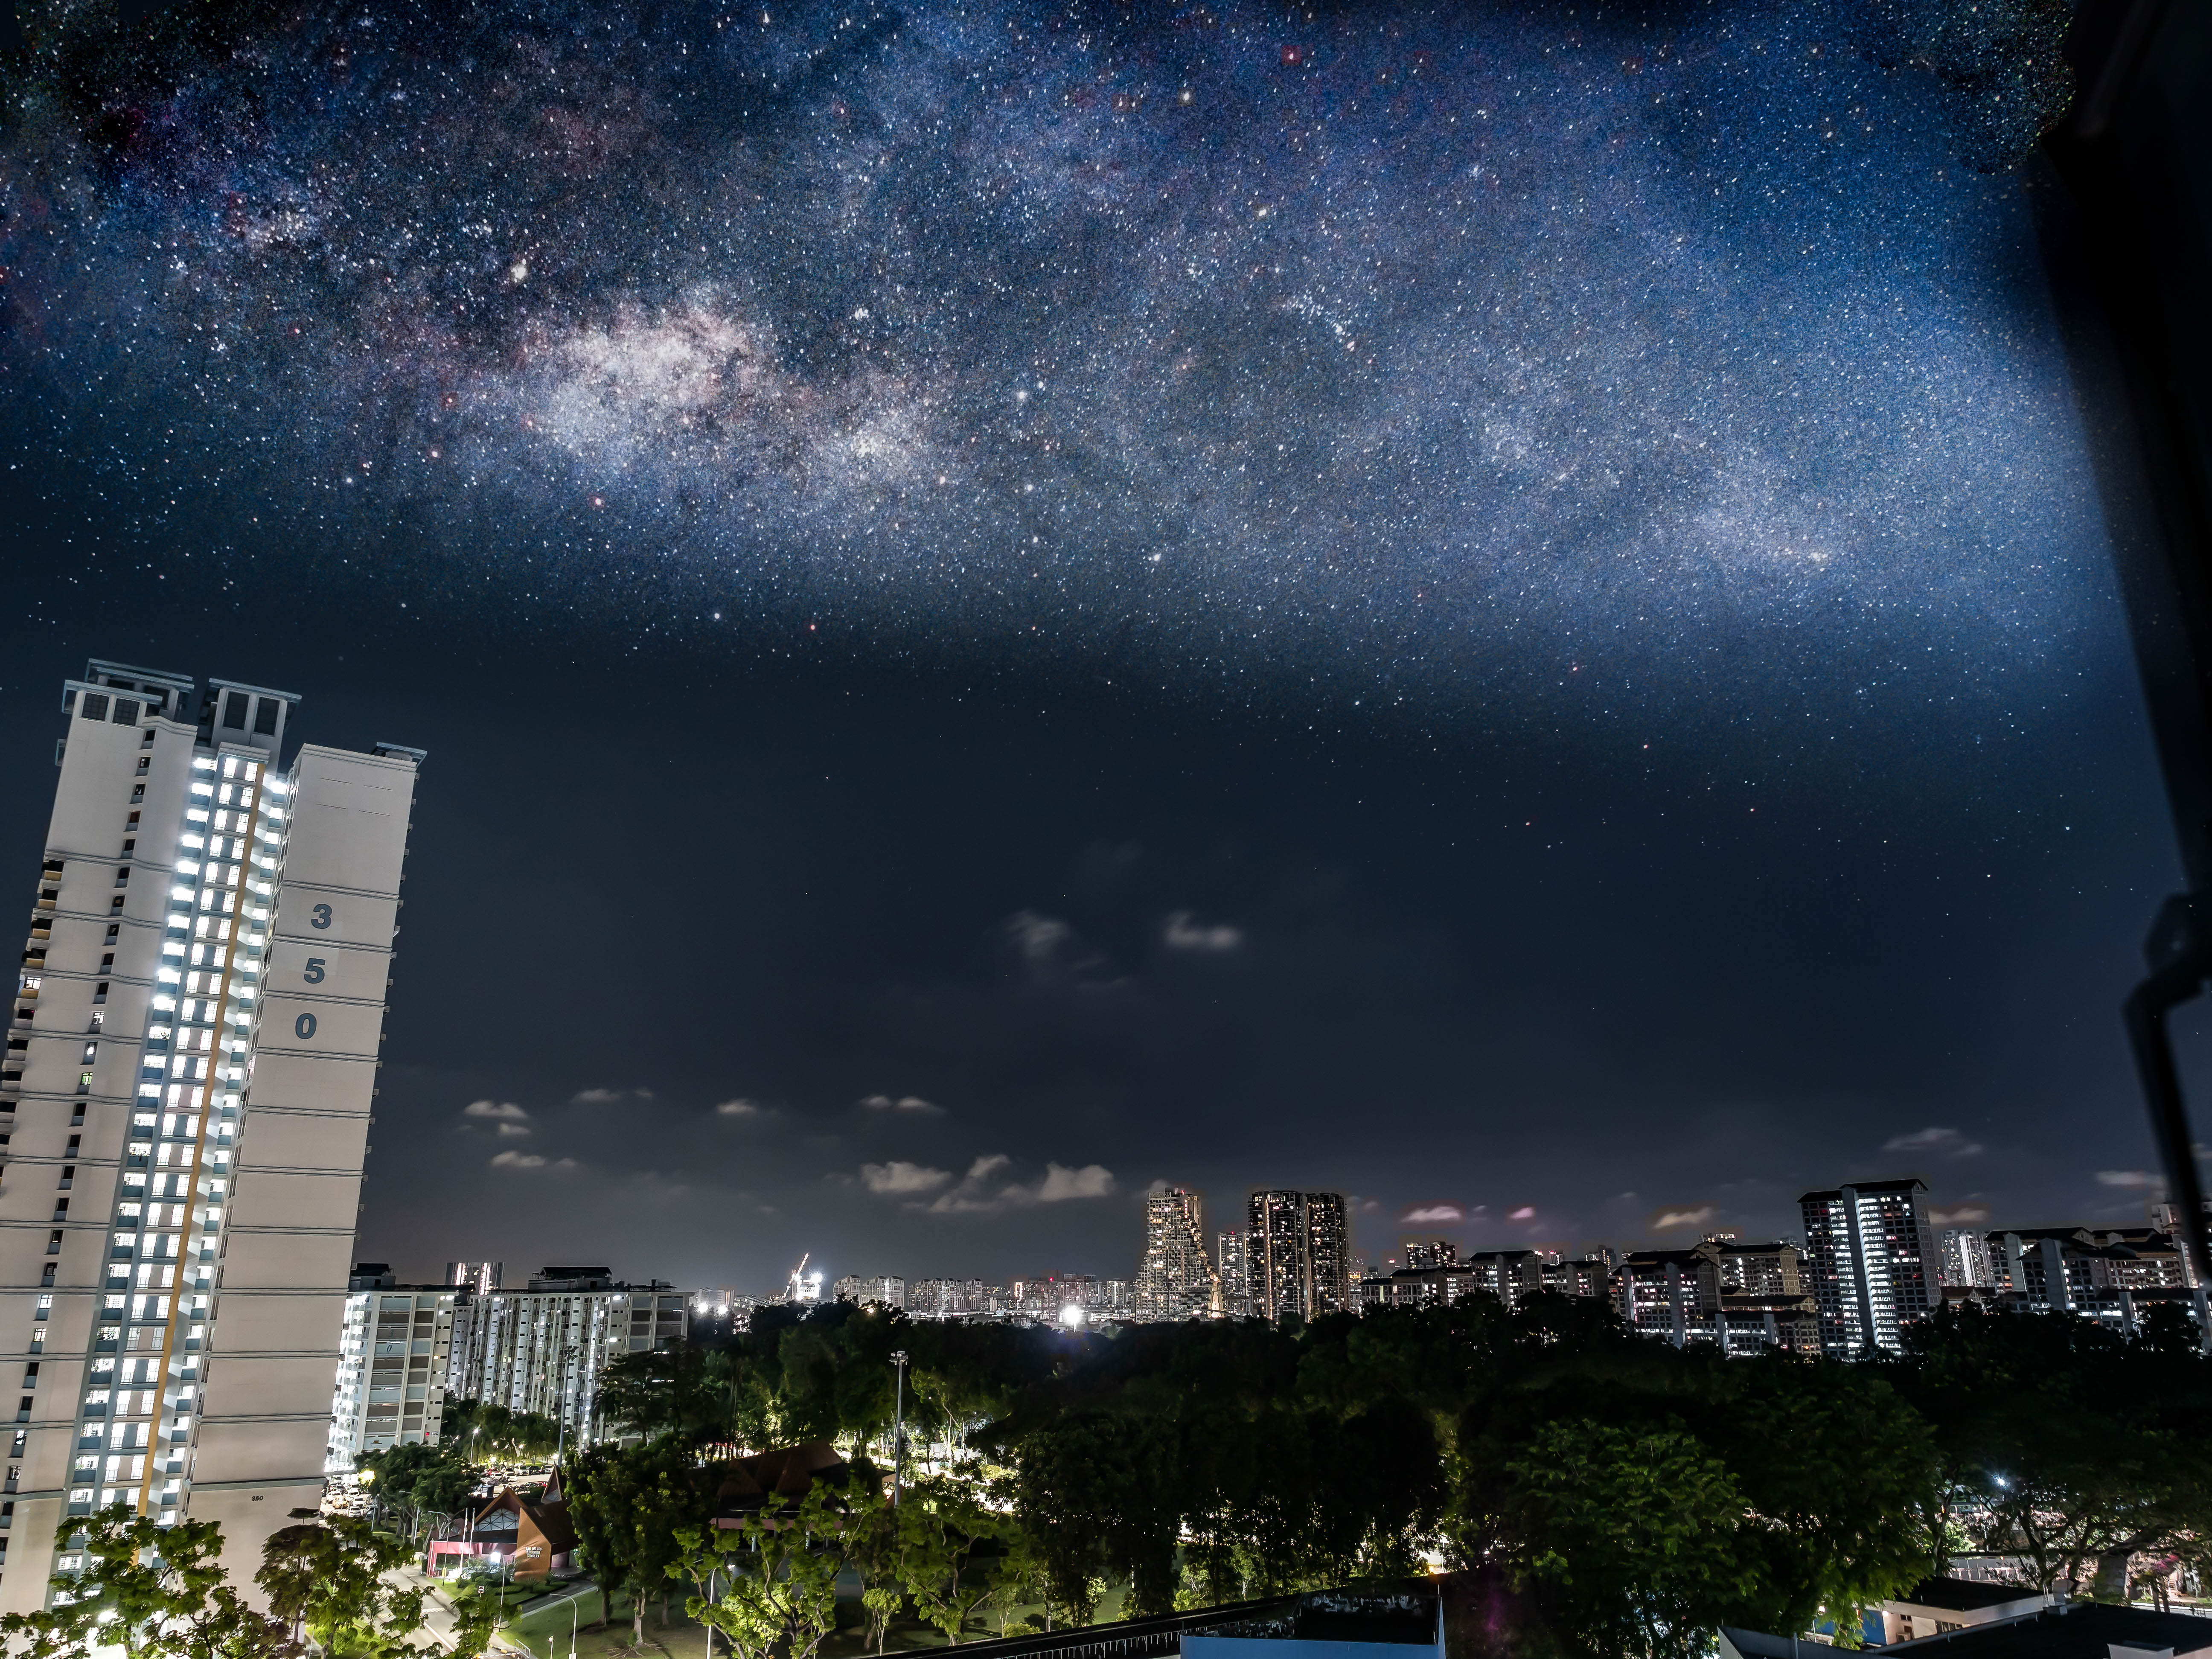 Image courtesy of Joshua Chua.
While clear and cloudless nights are the best weather conditions for stargazing and/ or attempting astrophotography, such moments are a rarity in Singapore as there are always some clouds most of the time.
Given such atmospheric conditions, Chua said he will have to "manually filter" out the photos where the clouds are in the way.
But his efforts were well worth it as the result is an ultra-clear and uninterrupted photo of the Milky Way galaxy.
Shares process openly for others to do the same
And it seems that the online community are appreciative of Chua's efforts.
His photo has since garnered some 4,800 likes.
Many individuals were equal parts surprised to learn that the Milky Way can be seen locally, and struck by the clarity and brilliance of the photo.
Some perhaps wanted to try their hands at taking a similar photo and were curious to learn how the photo was constructed.
Chua did not disappoint and was eager to show people what's behind the curtain.
He responded to messages written by curious individuals, provided a rough outline in a follow-up Facebook post on Jul. 2, and openly shared his process in detail with Mothership.
This is perhaps because he too picked up astrophotography in the same way.
 Head of the Scorpio constellation along the Milky Way taken on Jul. 7. Image by Joshua Chua.
Chua works in the pharmaceutical industry and spends his free time taking photos, but mainly travel photos.
He only ventured into astrophotography, or astronomical imaging, recently in 2021 after he saw his friend's Instagram post and was inspired to give astrophotography a shot.
He said he learnt a thing or two from his friend and by watching many YouTube videos.
Process is largely automated
As it turns out, filtering out cloudy images was just one out of several steps to achieving a clear shot of the Milky Way, Chua said.
Check for weather
For starters, he would check the weather conditions using the National Environment Agency's satellite service and the Clear Outside mobile application.
He also makes sure to double confirm and checks physically by looking up to the sky to see if it is a starry night.
Setting up
Next, Chua checks for the location of the Milky Way using the PhotoPills mobile application and sets up his camera pointing in that direction and based on the application's NPF rule.
The camera, fitted with a wide angle lens and light pollution filter, is always facing south as the Milky Way is generally in the south-east part of the night sky.
Processing the images
After taking multiple images of the Milky Way and filtering out the cloudy images, he will chuck all the images that make the cut onto Sequator, a free computing software that automatically stacks all the images into one final image.
While Sequator is programmed to pick the most suitable images for stacking, Chua said he prefers to err on the safe side by filtering through the images manually before uploading them onto the software.
This helps reduce unwanted gradients or weird artefacts, such as cloud movement or a grey spot, during the software's stacking process and produces a "cleaner" stacked image.
This resultant image is then sent to Lightroom for post-processing, where he crops out unwanted details that mar the quality of the image.
This includes the corner of his window frame and the roof of the block across from his window, which Chua helpfully circled in black as an example.
 Image courtesy of Joshua Chua.
Lastly, Chua will use Photoshop to blend the stacked image and an image of the foreground together.
A tip that he has for the foreground photo is to capture it without the glow caused by the light pollution from surrounding street lights and buildings as it can be hard to filter out during processing.
Et voila, a composite photo of the Milky Way is produced.
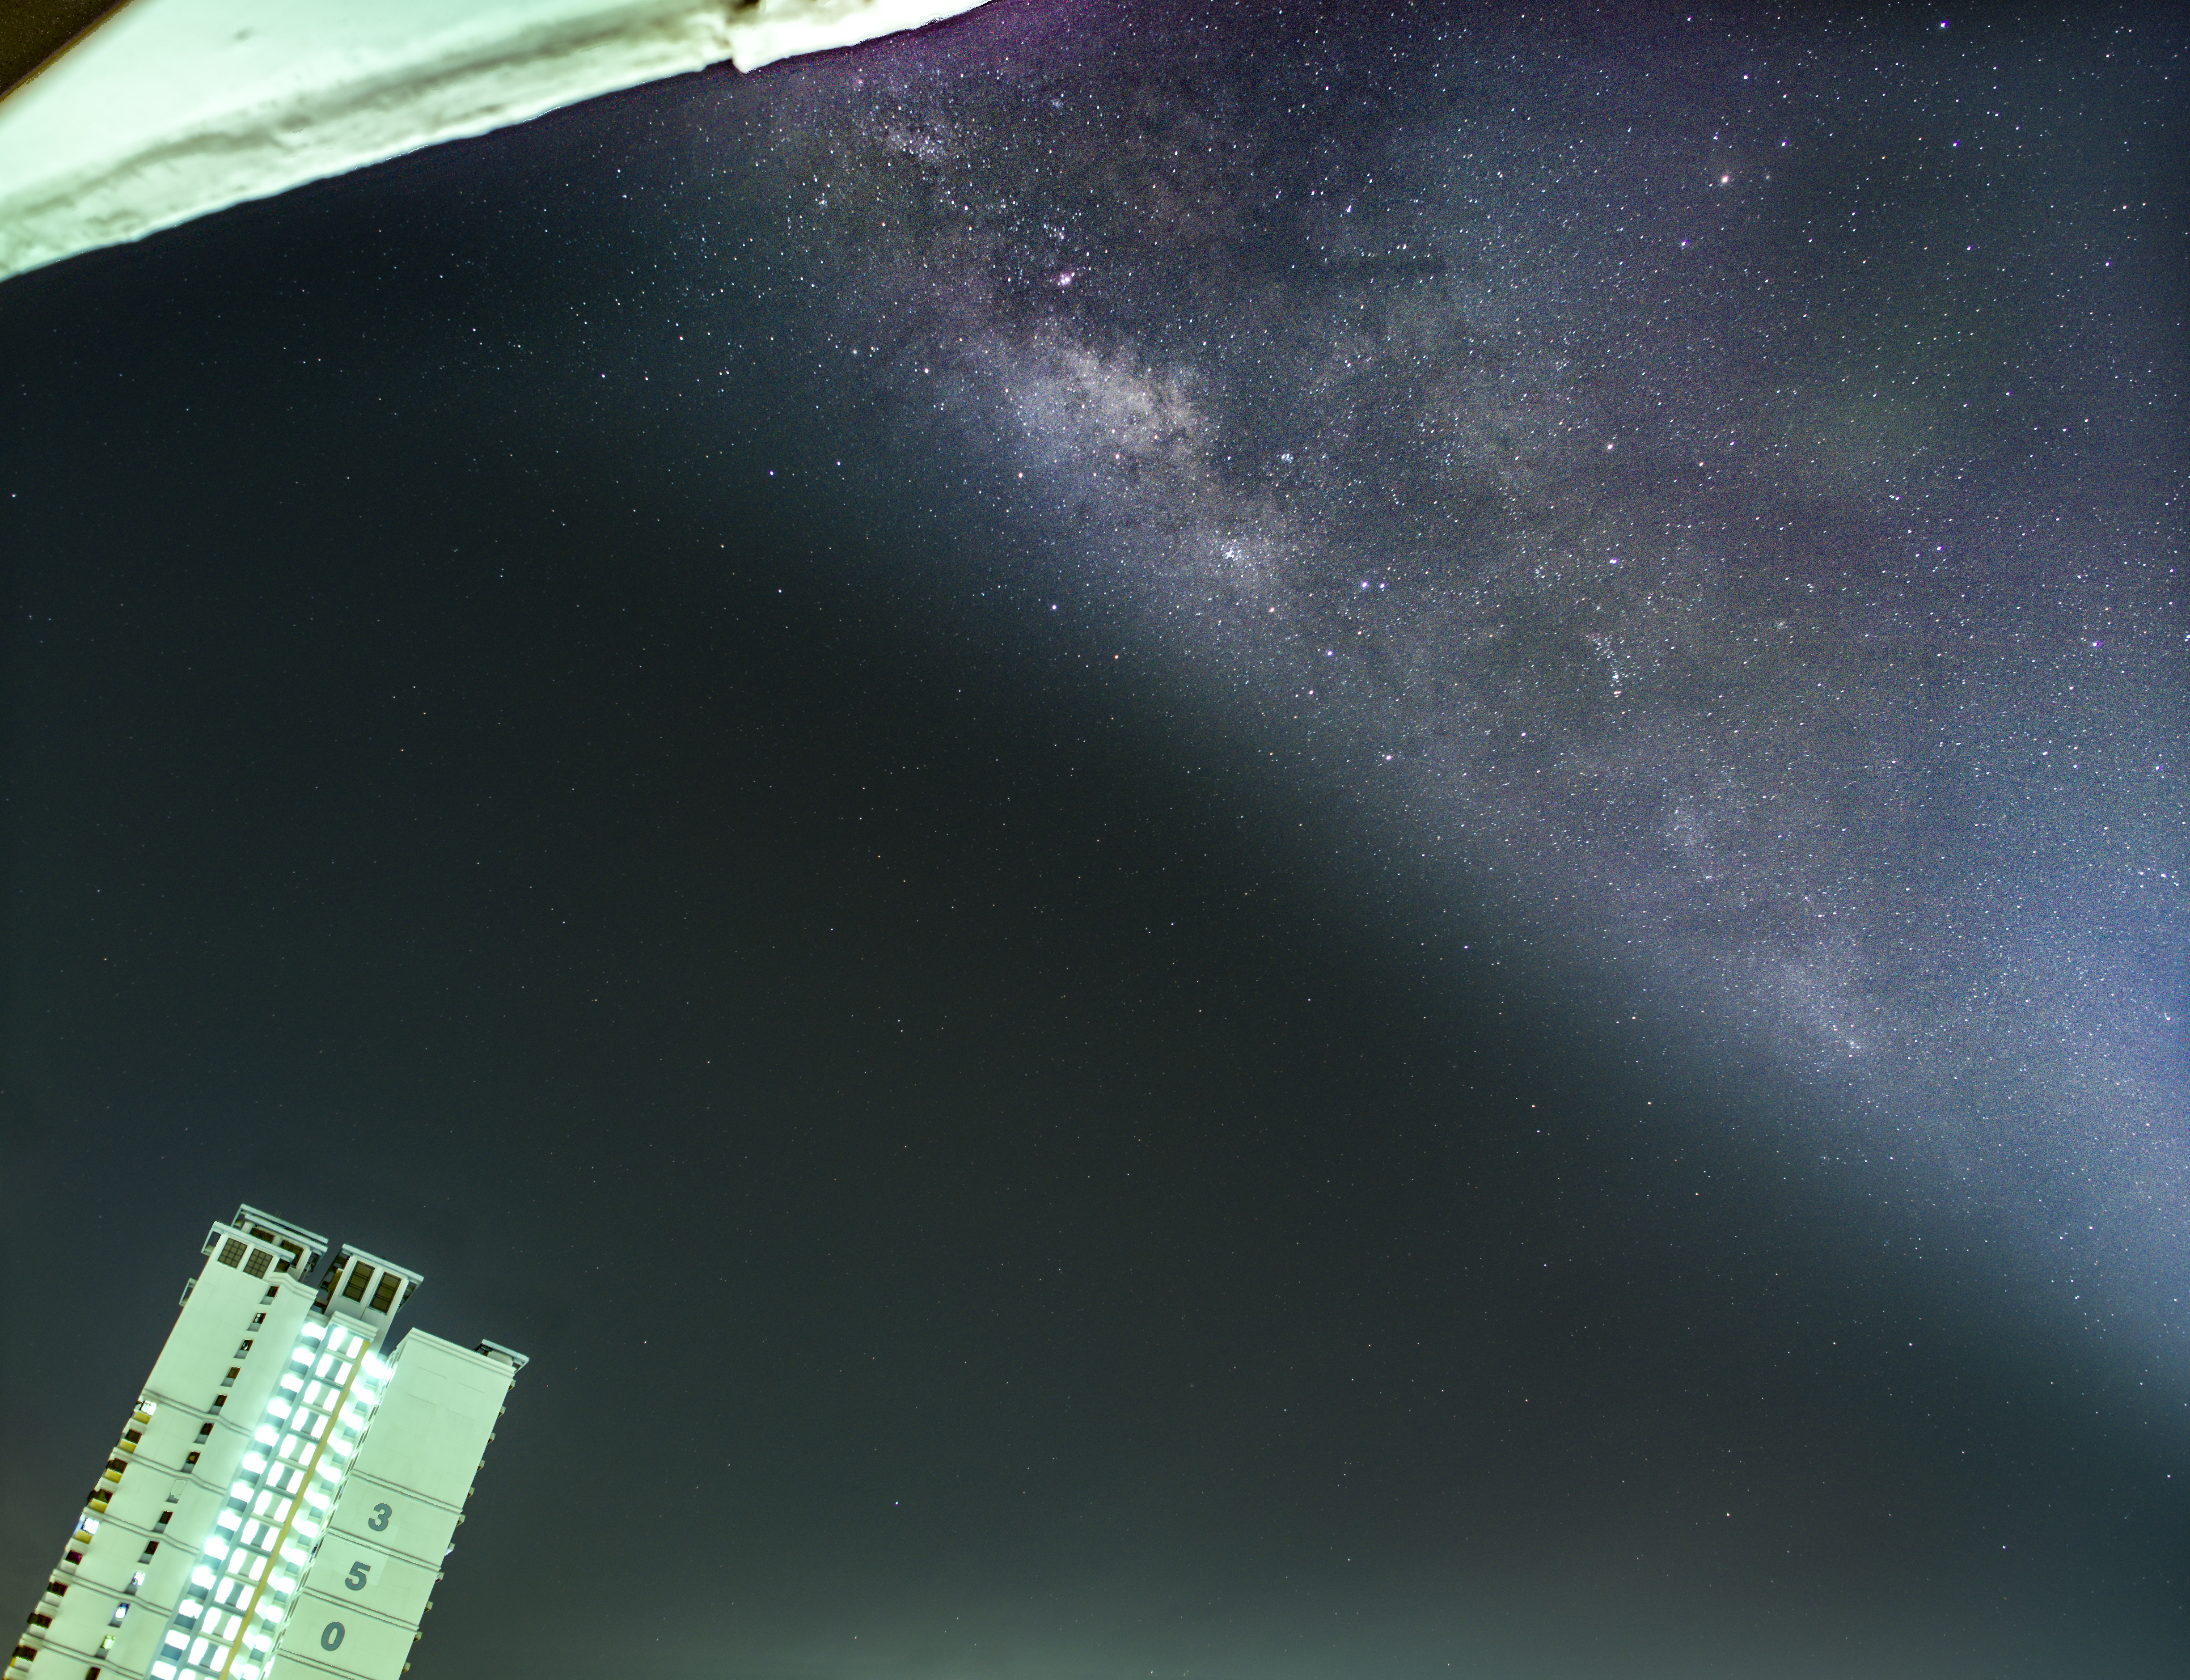 Image courtesy of Joshua Chua.
Tools used
While that may sound like quite a number of steps, most of it is automated.
Including the 45 minutes taken to capture the 110 pictures of the Milky Way, Chua said the entire process of setting up and then creating the stacked image with the help of the softwares mentioned only took him less than two hours.
If you'd like to try your hand at photographing the Milky Way, here's a checklist of the tools Chua used.
Hardware
- Camera: Olympus E-M5 Mark 3
- Wide angle lens: 12mm F2 Mzuiko
- Light pollution filter
- A clamp and ball head to support the camera
Software
- PhotoPills: Guide users on NPF settings based on the aperture, as well as position of the Milky Way
- Sequator: To stack the Milky Way images
- Lightroom: To crop and edit the photo's clarity, exposure and contrast, as well as correct its colours
- Photoshop: To blend the edited stacked Milky Way photo with the foreground photo
Here are more shots that Chua took for your viewing pleasure:
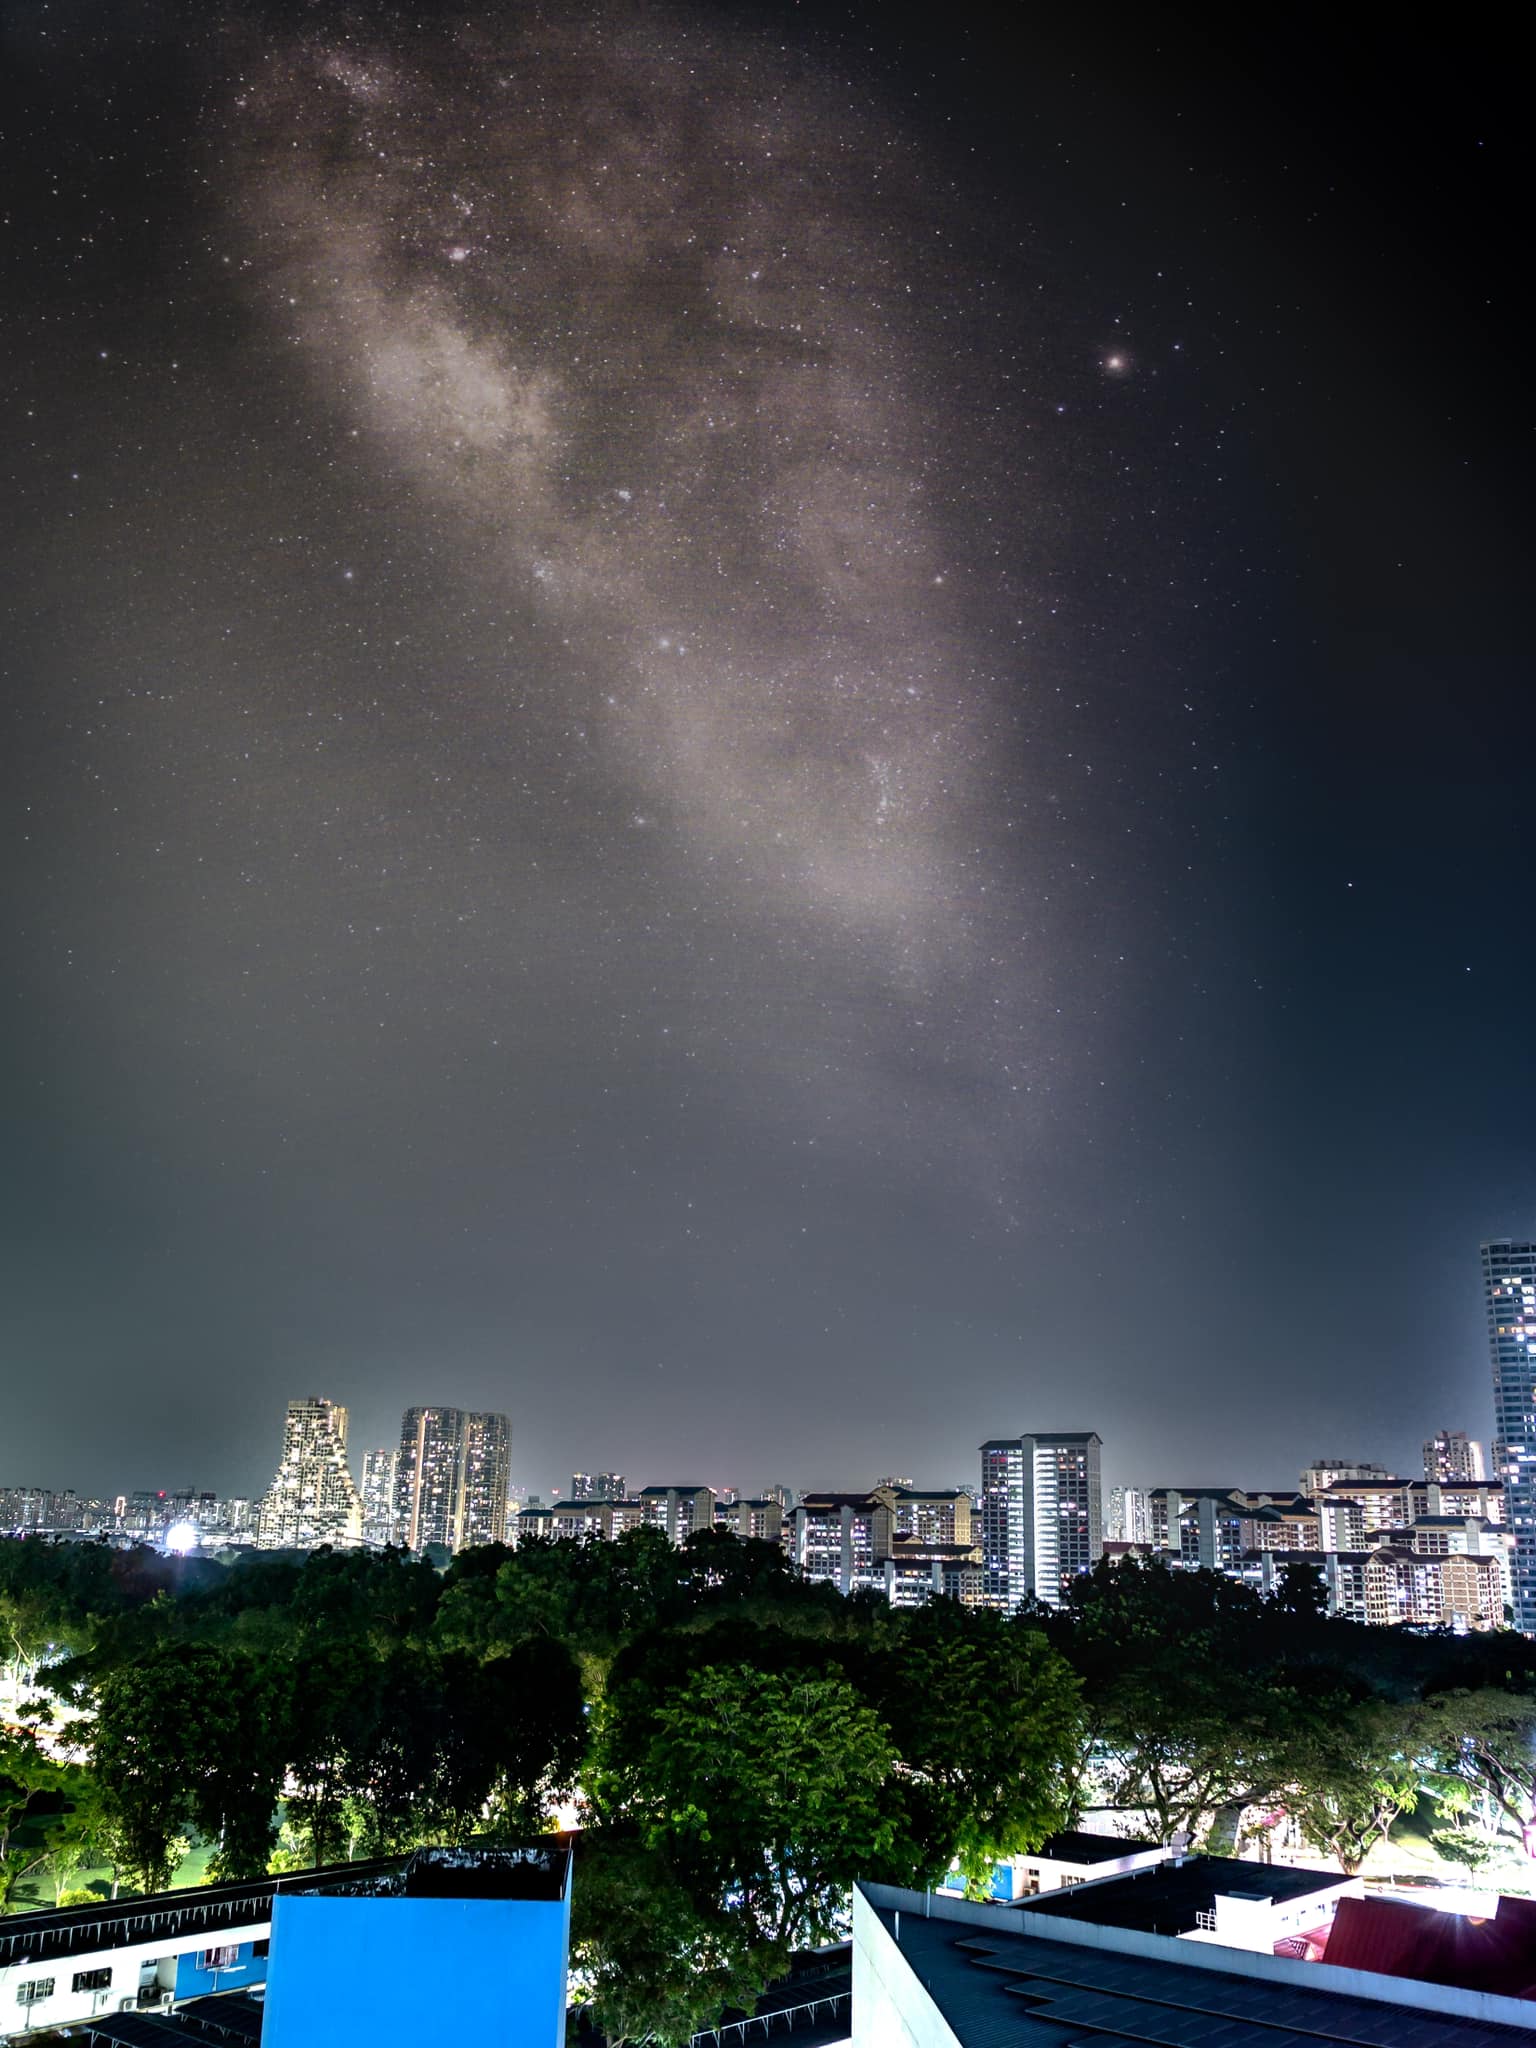 Image by Joshua Chua.
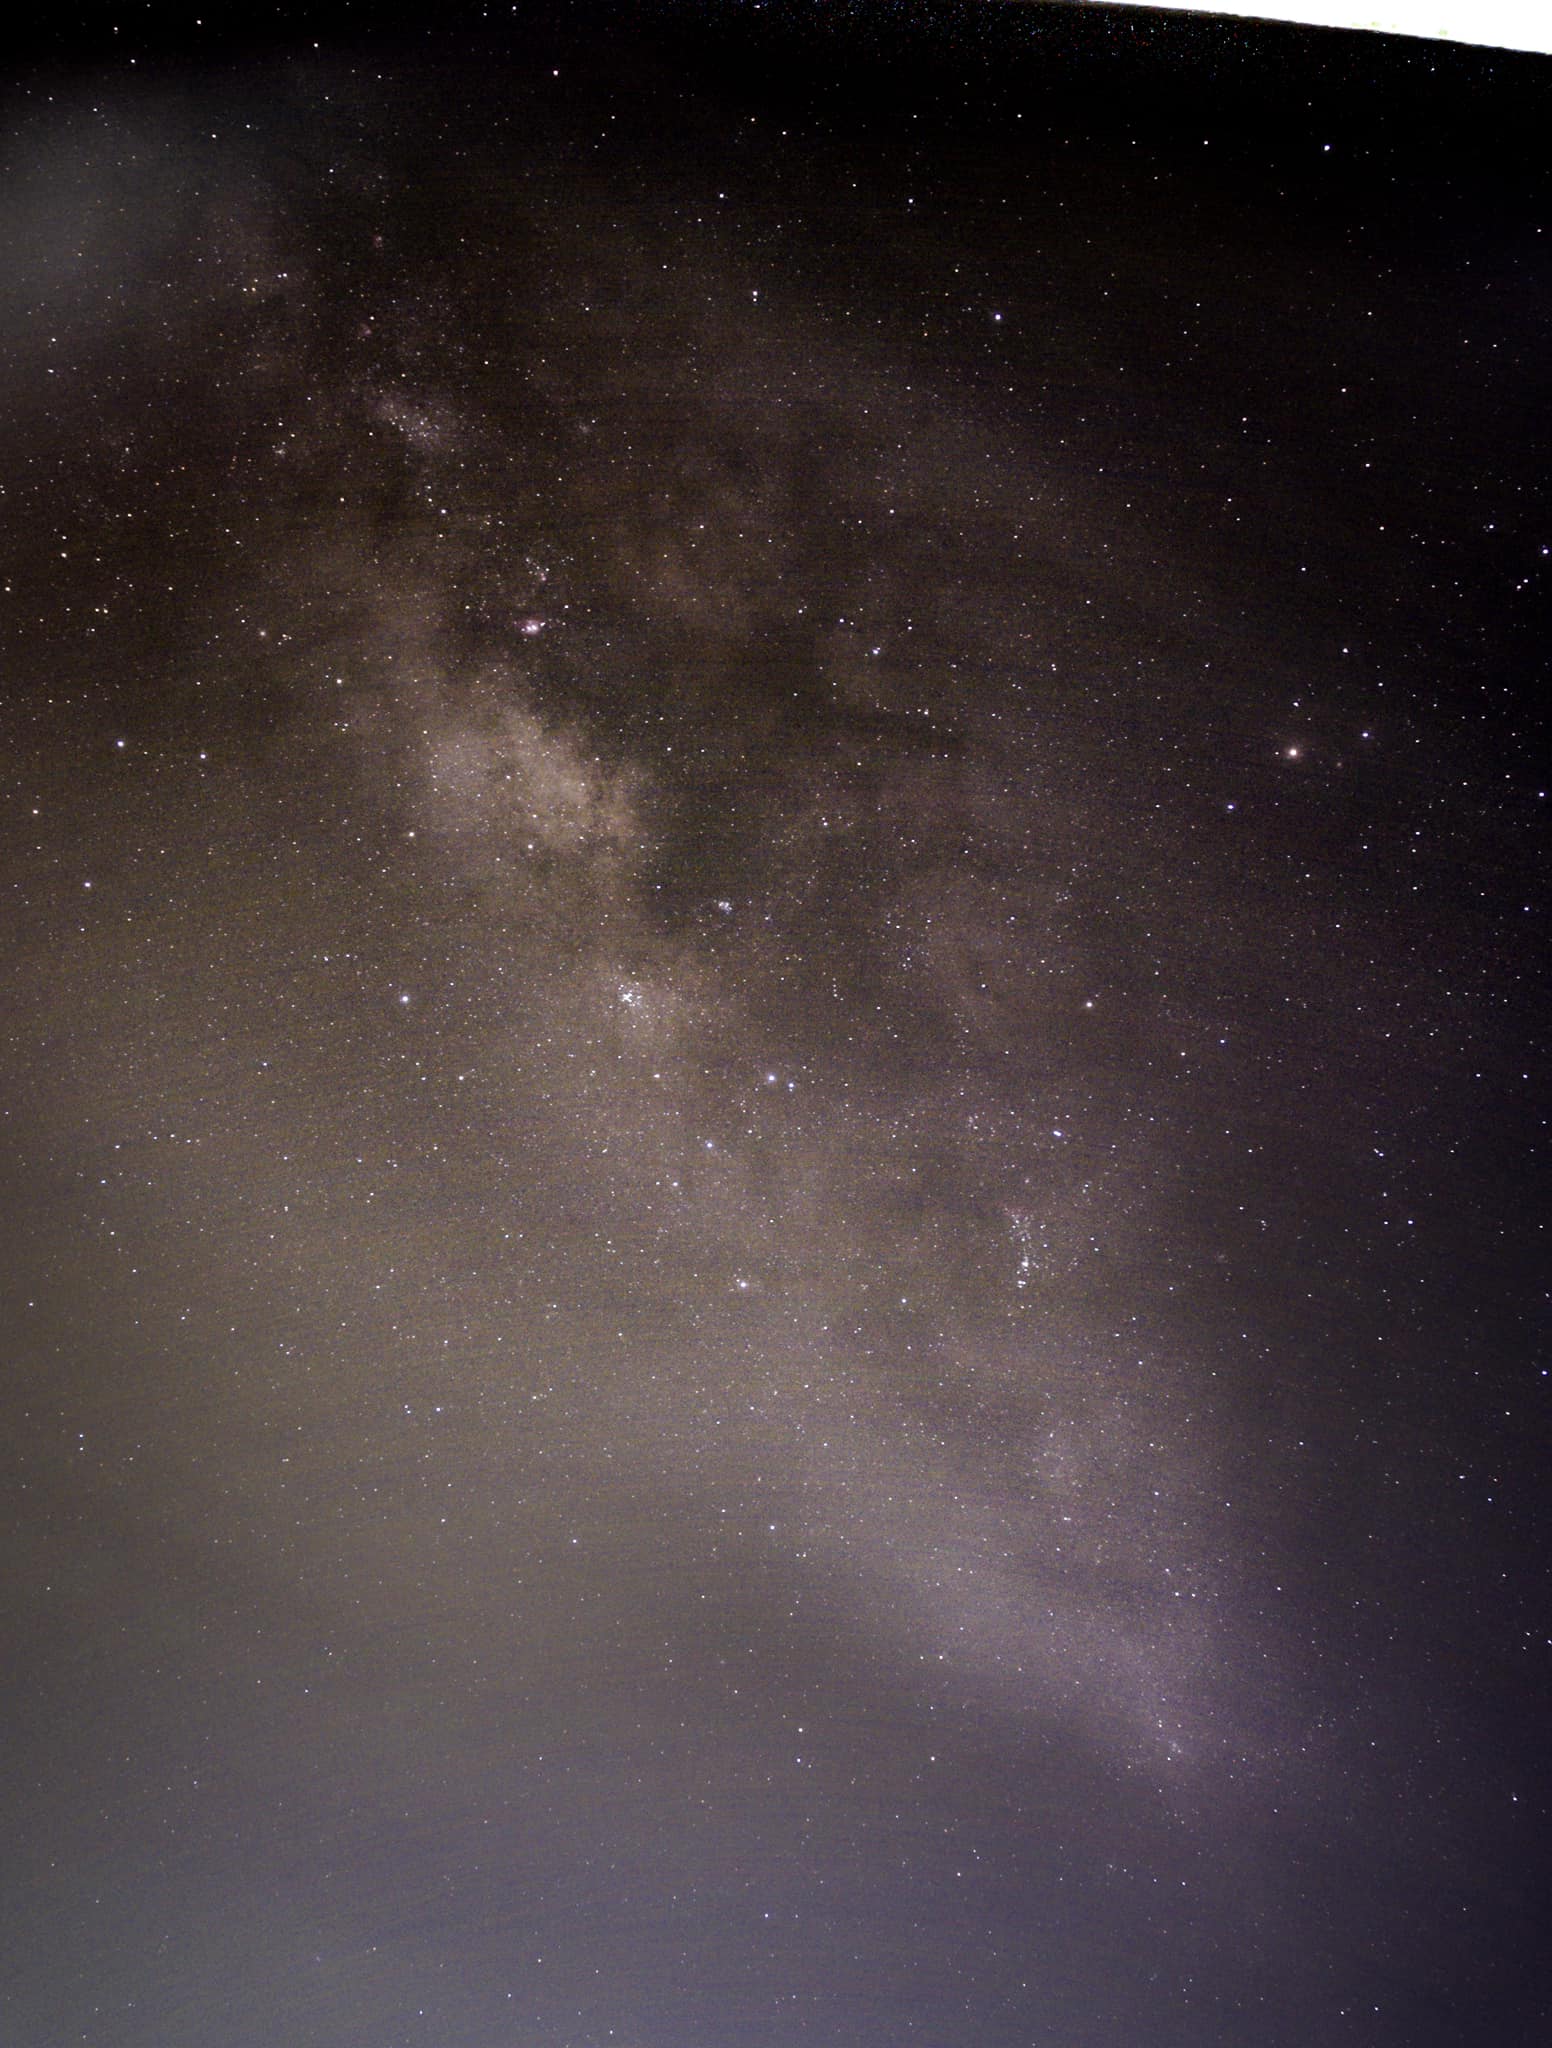 Image by Joshua Chua.
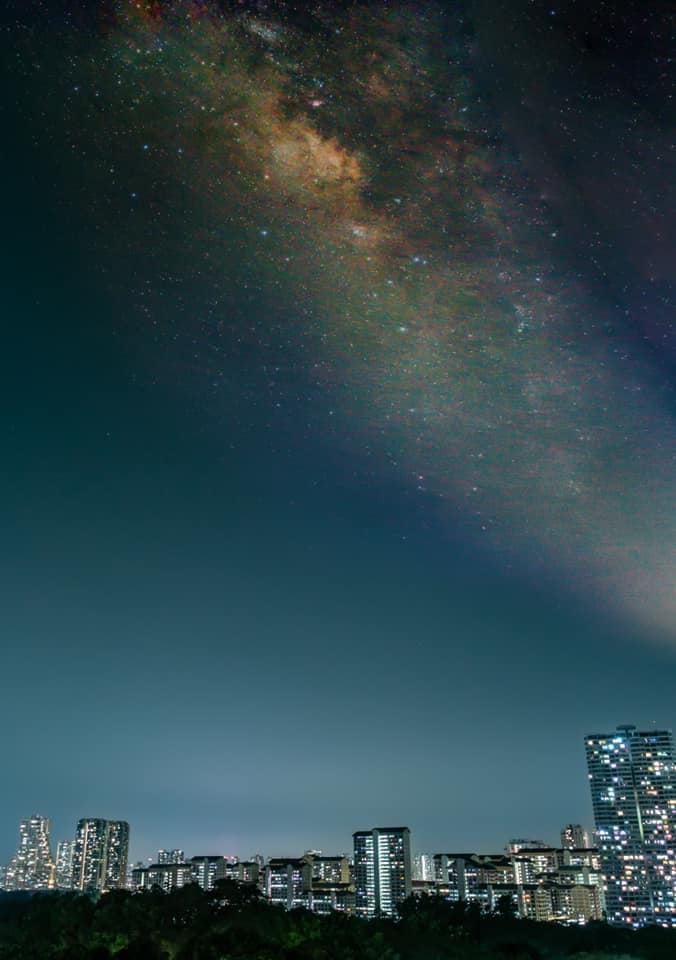 Image by Joshua Chua.
More astrophotographers in Singapore to inspire you

Top image by Joshua Chua
If you like what you read, follow us on Facebook, Instagram, Twitter and Telegram to get the latest updates.