


It's that time of the year again for lovebirds.
If you still don't know what to give your valentine (you only have a few days left, by the way), flowers are always a safe option.
However, most bouquets will set you back quite a bit.
If you want to express your sincerity with something handmade — or if you're on a tighter budget — then we've got you covered with our little DIY bouquet moment.
Step 1: buy the flowers
You can get your flowers at floral shops like Ji Mei Flowers (the one we visited).
We went with the most traditional option: red roses.
In addition to the red roses (S$15 for 10), we also got the white misty (S$12.50 for a huge bunch)limonium for variety. Limonium is a kind of flower that resembles baby's breath, albeit smaller.
Why not baby's breath, you ask? The reason is simple: it's more expensive.
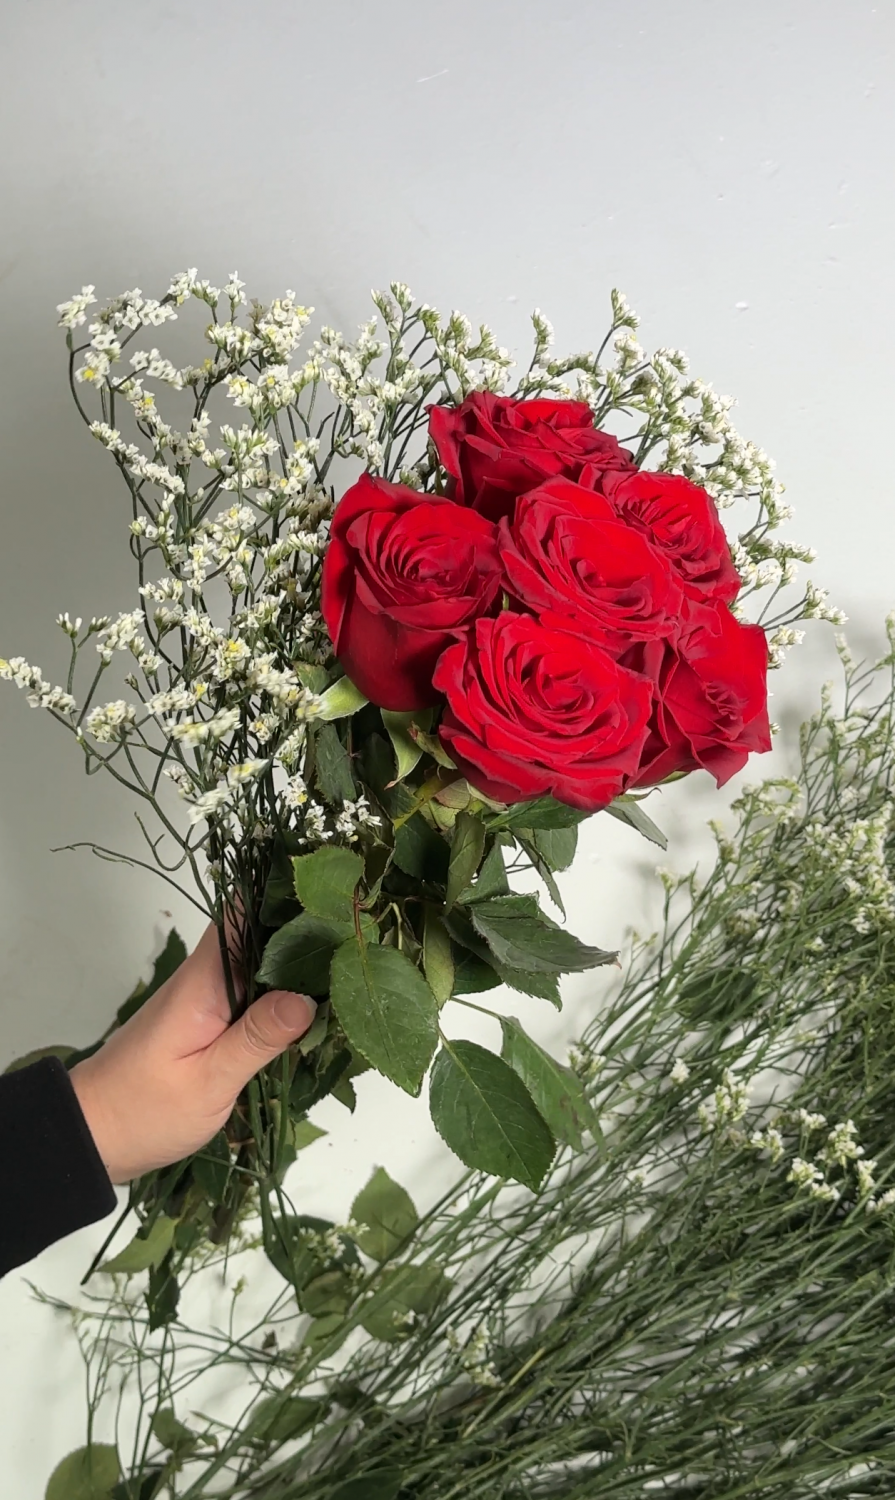 Photo by Livia Soh
It's worth considering the colour scheme of your bouquet. In our selection, the white of the limonium will help contrast and accentuate the red of the roses.
You'll also need supplies like scissors, jute string (S$1.90 for a huge ball) and some form of wrapping (S$4.90 for six sheets).
At this point, you might be going "Aha, you paid more than S$20!!!".
Our next life hack: if you're really going for the budget option, find a buddy who also needs a bouquet, and split the cost with them.
For those who don't like math: (S$15 + S$12.50 + S$1.90 + S$4.90) split by two people means you'll need to fork out S$17.15 each.
Step 2: curate
Before you get to assembling the bouquet, cut off unwanted thorns or leaves on the stems.
You should also ensure that the flowers you've selected are of equal length; trim away excess stems if needed.
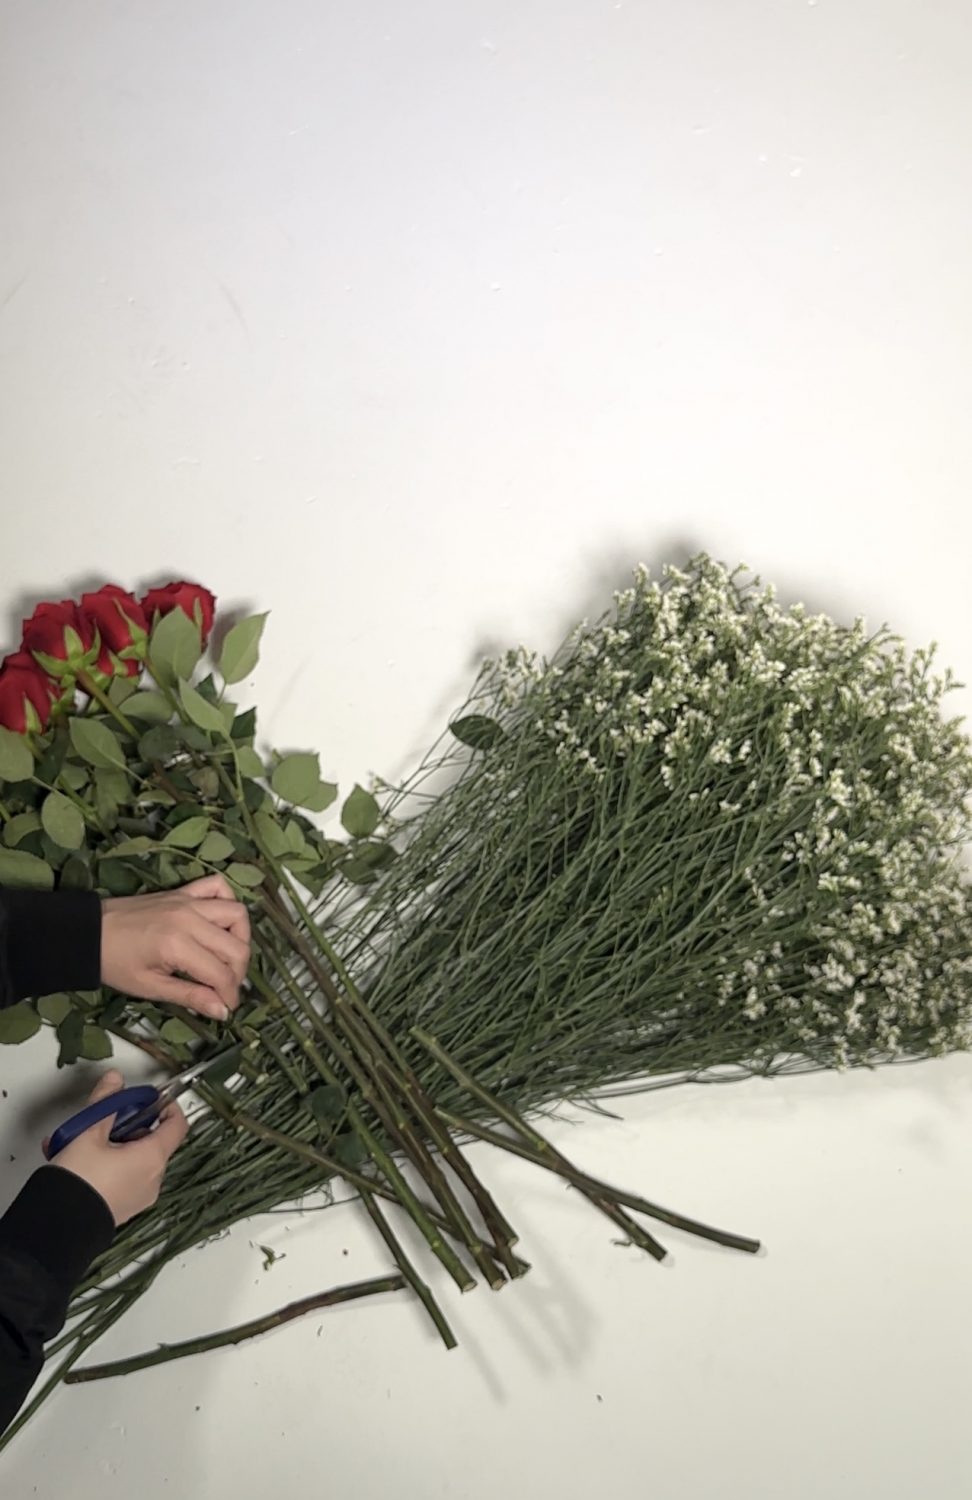 Photo by Livia Soh
Step 3: arrange
Now's when your bouquet starts taking shape.
You'll want to pick the prettiest of the flowers to be the centre of your bouquet.
After arranging the first layer of flowers around it, hold your masterpiece with one hand and tie everything together with a rubber band so that they stay in place.
 Photo by Livia Soh
Then, add the rest of the flowers, spreading them out evenly and making sure the top of the flowers are roughly aligned.
When you're satisfied with how they look, bind the flowers with jute string.
Step 4: wrap
For the five-rose bouquet, we used one piece of the wrapping paper.
Bigger bouquets (read: the ones you don't share) will require up to four sheets.
The most straightforward — at least to us, anyway — way is to fold the square wrapping sheet into a triangle, and roll your flowers up in it. Secure them in place with double sided tape.
 Photo by Livia Soh
For bigger bouquets, repeat the process, rotating the bouquet 45 degrees as you move on to the next sheet of wrapper.
That being said — there isn't one way to wrap your bouquet, and if you want to go with a more natural finish, do away with the wrapper altogether.
Step 5: finish
Finally, tie the bouquet up with a bow and you're done!
 Photo by Livia Soh
Of course, this step is optional.
Here's what our S$17.15 bouquet of five roses looks like:
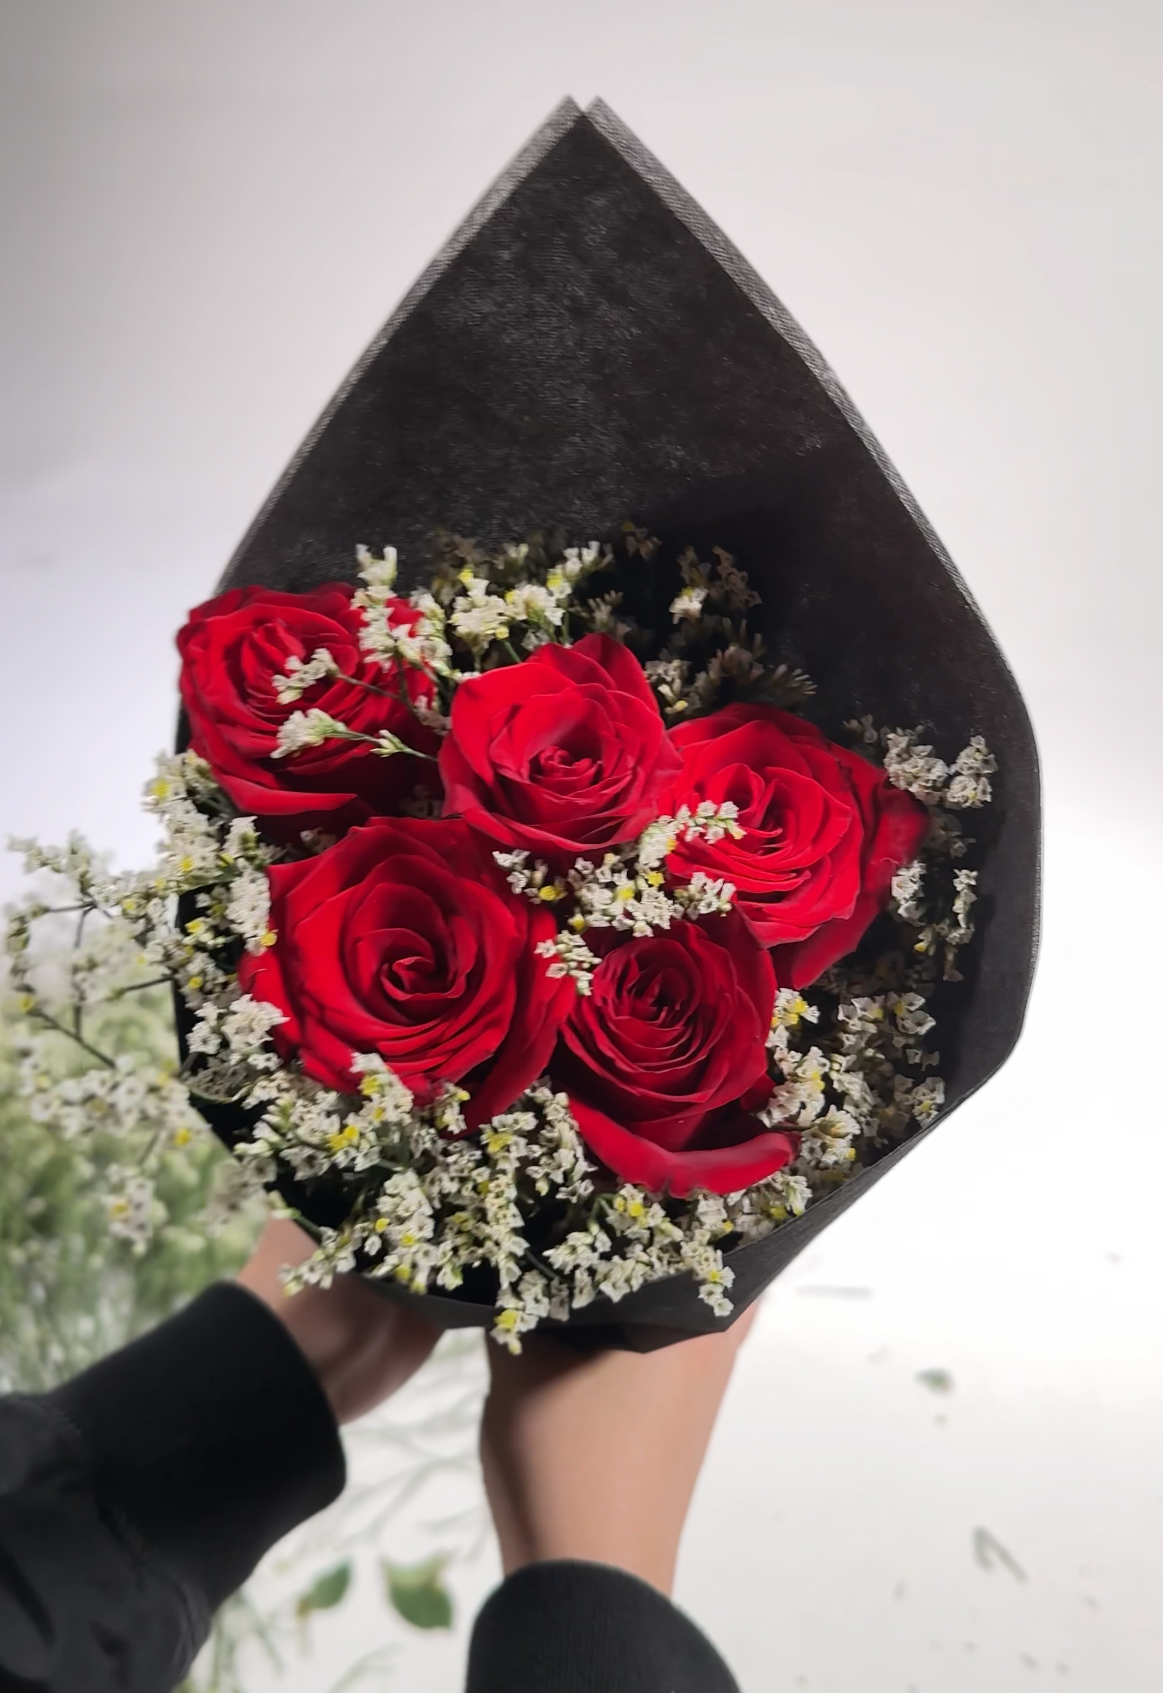 Photo by Livia Soh
And here's what the S$34.30 bouquet of 10 roses looks like:
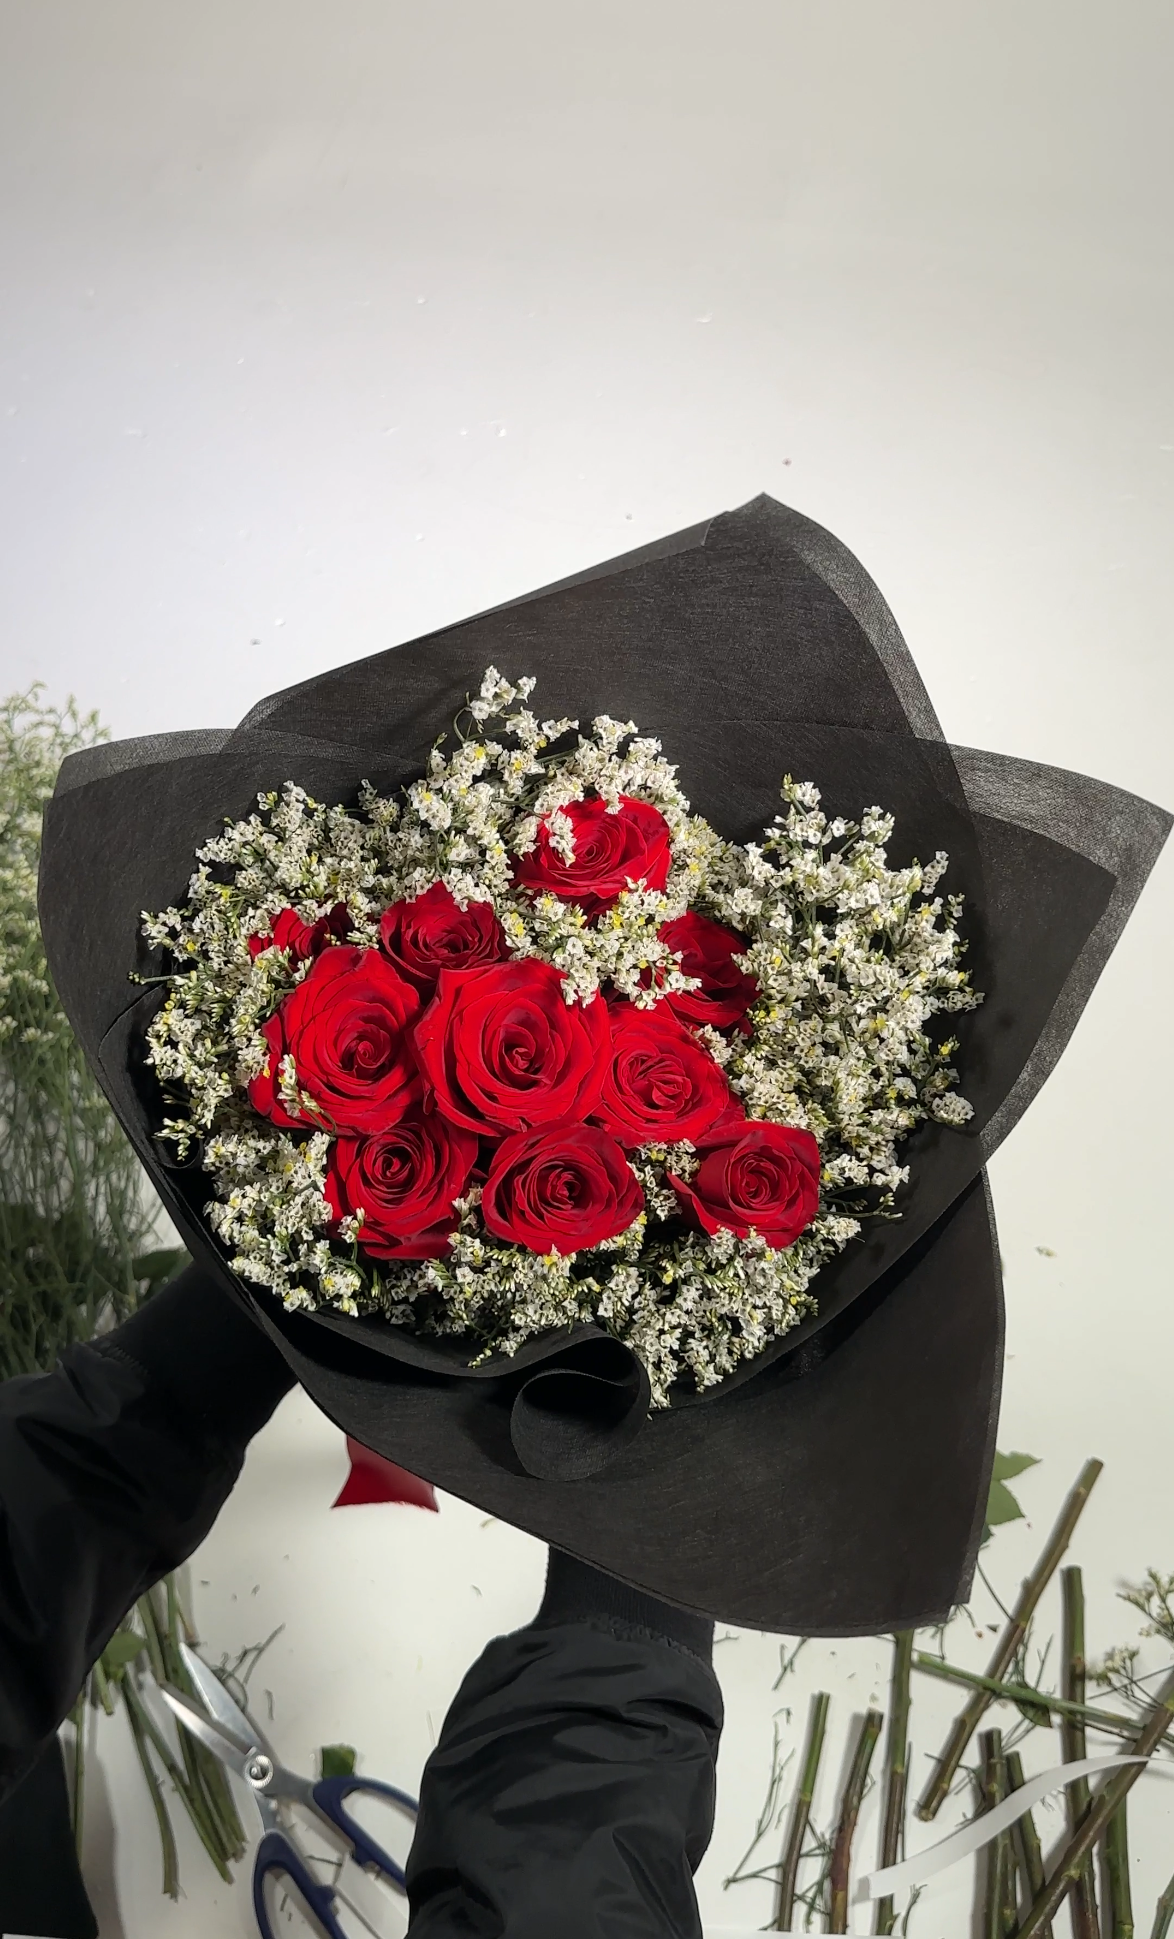 Photo by Livia Soh
You're welcome.
Top photos by Livia Soh
If you like what you read, follow us on Facebook, Instagram, Twitter and Telegram to get the latest updates.